
When it comes to motorcycle maintenance, one of the most crucial parts to keep in top shape is the carburetor. If you’ve ever wondered how to clean a motorcycle carburetor or why it’s so important, you’re not alone. Over time, dirt and grime can clog your carburetor, leading to poor engine performance or starting issues. Don’t worry, though—this guide will walk you through the process step by step, ensuring your bike runs smoothly. So, let’s dive in and discover how easy carburetor motorcycle cleaning can be when you know what you’re doing!
Table of Contents
What Is a Motorcycle Carburetor?
A motorcycle carburetor might seem like just another part of your bike, but it plays a huge role in making sure everything runs smoothly. Think of it as the heart of your bike’s engine, mixing air and fuel in just the right way to get your ride purring like a kitten. When it’s clean, your engine runs strong and efficient. But when it’s clogged, even the most experienced rider can feel the difference—rough idling, sputtering, and even stalling. This is where carburetor motorcycle cleaning comes in.
A clean carburetor ensures that everything runs as it should, making your ride more enjoyable and less prone to costly repairs. By keeping it in top shape, you’re not only boosting performance but extending your bike’s life too. In this section, we’ll break down exactly what a carburetor does, why it’s so important to keep it clean, and the issues you might face if you let it go too long without maintenance. So, let’s get into the nitty-gritty of how to clean a motorcycle carburetor and keep your bike in peak condition!
Signs You Need to Clean Your Carburetor
Imagine you’re gearing up for a ride, but as you twist the throttle, your motorcycle sputters and struggles to accelerate. Frustrating, right? This could be a sign that it’s time for some carburetor motorcycle cleaning. A dirty carburetor doesn’t just slow you down—it can cause a series of performance issues that take the fun out of riding. When dirt, grime, and fuel deposits build up inside, your engine can’t function as efficiently, leading to poor performance, difficulty starting, and even stalling.
So, how can you tell when your carburetor needs attention? It’s all about paying attention to the signs. If your bike is stalling out or not responding like it used to, your carburetor might be the culprit. A clean carburetor helps with fuel efficiency, smooth idling, and better throttle response. It can feel like a whole new bike once it’s cleaned! In this section, we’ll take a look at the telltale signs that indicate it’s time to clean your carburetor and get back on the road with confidence.
Tools and Materials You’ll Need
Before diving into how to clean a motorcycle carburetor, it’s important to gather the right tools. Think of it like prepping for a big ride—you wouldn’t go without a helmet, right? The same goes for carburetor cleaning. With the proper equipment, your task becomes much easier and smoother.
You’ll need a few basic tools like screwdrivers, gloves, and a cleaning solution to get started. These items will help you safely remove and clean the carburetor. If you want to take it a step further and clean the jets, having a carburetor cleaner spray or some compressed air will work wonders. Trust me, I’ve been there and had to improvise with what I had on hand, but having the right tools makes the job way less frustrating.
Safety first! Always make sure you’re working in a well-ventilated area, especially when using chemicals. And take your time to ensure you don’t damage any of the delicate parts. In the next section, we’ll walk you through the exact tools you’ll need for a successful carburetor motorcycle cleaning session. Let’s get your bike running at its best!
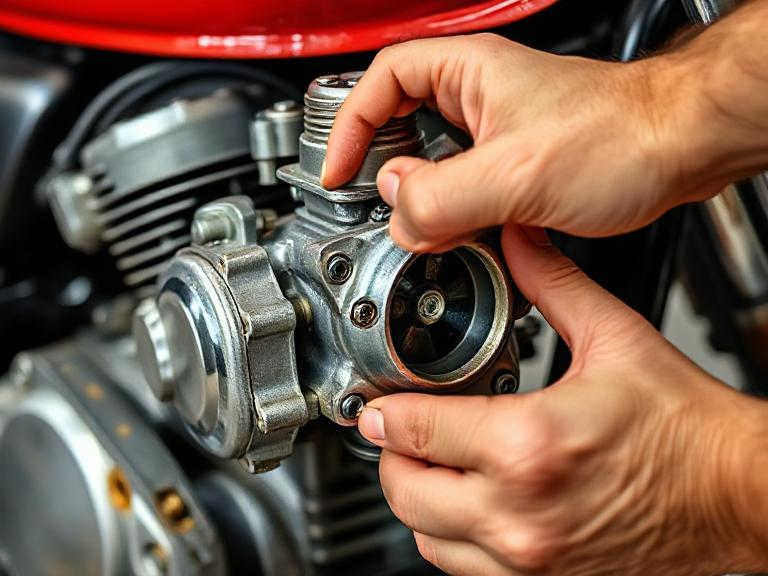
Step-by-Step Guide: How to Clean a Motorcycle Carburetor
Cleaning your motorcycle carburetor may sound like a daunting task, but trust me, it’s not as hard as it seems. Once you break it down step by step, it becomes a manageable and even rewarding process. I remember the first time I had to clean mine—it felt like a big challenge, but once I started, it all came together.
To get started, you’ll need to remove the carburetor from your motorcycle. Don’t worry, this part is simpler than it sounds. First, make sure your bike is off and cool to the touch. Then, disconnect the fuel line and unscrew the carburetor from the intake manifold. Take note of how everything is connected—taking a picture can help you later when you need to put it all back together.
Next, take a close look at the carburetor. Look for any visible damage or parts that show signs of wear. If you spot anything concerning, like cracks or corrosion, it might be time to replace those parts. If everything looks okay, move on to cleaning.
Start by wiping down the exterior of the carburetor with a clean cloth. It’s not just about looks—it helps remove dirt that could interfere with the cleaning process. Then, carefully disassemble the carburetor by removing the float bowl and jets. This is where you’ll need to use your carburetor cleaner. If you’re unsure how to clean jets in a carburetor, grab your wire brush or compressed air to clear out any blockages gently. Be patient with this step, as the jets play a vital role in your engine’s performance.
Once everything is cleaned, make sure all parts are dry before reassembling. Putting the carburetor back together is as simple as reversing the disassembly process. Reattach the carburetor to your bike, reconnect the fuel line, and you’re good to go!
I know it might seem like a lot, but if you take it slow and follow each step, you’ll be able to tackle this like a pro. A clean carburetor means a smoother, more efficient ride, and trust me, it’s worth the effort!
Watch my tutorial
In this video, we’ll guide you through:
Carburetor Motorcycle Cleaning Tips for Best Results.
If you want your motorcycle to run smoothly, maintaining your carburetor is key. Think of it as the heart of your bike’s engine—it needs regular care to keep the pulse strong and steady. After all, a clean carburetor isn’t just about appearance; it’s about performance, fuel efficiency, and longevity. But to get the best results from your carburetor motorcycle cleaning, there are a few tips you’ll want to keep in mind.
First, always remember that gentleness is the key when handling the delicate parts of your carburetor. A light touch goes a long way—over-tightening screws or applying excessive force during disassembly can damage critical components. Trust me, you don’t want to end up needing more repairs than just a clean carburetor. Be sure to use the right cleaning solutions too. Avoid using harsh chemicals that can cause corrosion or damage sensitive parts. Stick to carburetor cleaner, or a mild cleaning solution designed for motorcycle carburetors. This will ensure you’re not making more work for yourself down the line.
Also, make sure everything is thoroughly dry before reassembling. After cleaning those tiny jets, let them sit for a bit before putting everything back together. It’s one of those little details that make a big difference. Once you’ve put everything back in place, take a moment to do a quick inspection. Check the fuel lines and the carburetor mount to make sure nothing’s out of place.
Finally, preventive maintenance is your best friend. If you keep your carburetor clean regularly, you’ll avoid the need for more frequent, in-depth cleaning. It’s like anything in life—small maintenance tasks can prevent big problems later on. Just remember, a clean carburetor doesn’t just improve engine performance—it helps you enjoy your ride with fewer headaches.
Ready to give your bike the attention it deserves? Start with these tips for the best carburetor motorcycle cleaning results and enjoy that smooth, reliable ride!
Common Mistakes to Avoid When Cleaning a Carburetor
When it comes to cleaning a carburetor, it’s easy to think that all you need is a little elbow grease and some good cleaning products. But trust me, making even a small mistake can cost you—both in time and in bike performance. I’ve had my fair share of carburetor cleaning blunders, so let me share some key mistakes I’ve learned to avoid. Hopefully, you can skip the hassle!
First off, don’t over-tighten any screws or parts. It’s tempting to go full force, especially when reassembling the carburetor, but applying too much pressure can crack the body or strip threads. I once tightened a screw a little too much, and let me tell you, it wasn’t a pleasant fix. Your carburetor should be snug, but not tight enough to damage sensitive components.
Another common mistake is using improper cleaning agents. While it might seem harmless to grab the nearest cleaner or solvent, using the wrong product can ruin your carburetor’s parts. I learned this the hard way when I used a generic cleaner that left residue, which only led to more problems down the line. Always use a dedicated carburetor cleaner to get rid of the gunk without causing long-term damage. It’s worth the investment.
Lastly, don’t forget to inspect parts for wear and tear. You might be focused on cleaning the jets or float bowl, but those parts won’t do much good if they’re damaged. Overlooking a small crack in the gasket or a worn-out jet can make your efforts pointless. If you notice anything that looks off, replace it before you start putting the carburetor back together.
By avoiding these mistakes, you can ensure that your carburetor gets the treatment it deserves, leading to better bike performance. It’s all about being thorough and paying attention to the details. Keep these tips in mind, and your carburetor will thank you with smooth operation and reliable performance. Have you made any of these mistakes before? Share your experience—I’d love to hear how you handled it!
When to Seek Professional Help
Sometimes, no matter how careful we are, cleaning the carburetor ourselves just isn’t enough to solve the problem. If your bike is still struggling to start or sputtering after a deep cleaning, it might be time to seek professional help. Trust me, I’ve been there—tinkering away with the carburetor, thinking a good cleaning should do the trick, only to realize that a more experienced hand is needed.
There are a few signs that it’s time to put down the wrench and call in the pros. For example, if you’ve cleaned your carburetor thoroughly but the bike’s performance doesn’t improve, the issue might be more complex than a dirty carb. It could be a bigger problem, like a worn-out gasket or fuel line, which needs a professional’s attention. Or, if you notice your carburetor is leaking fuel or has damaged seals, it’s definitely time to hand over the work to someone who has the tools and know-how to fix these issues.
A clean carburetor should get your engine running like a charm, but sometimes parts are too far gone to be revived with just cleaning. If you’re seeing symptoms like engine misfiring, backfiring, or just low fuel efficiency despite your efforts, it could indicate that your carburetor or its components need a replacement or deeper inspection. Don’t be afraid to ask a mechanic for help if things get tricky.
So, if you’ve given it your best shot and your bike still isn’t performing the way it should, don’t hesitate to take it to a mechanic. Getting professional help can save you time, headaches, and potentially costly mistakes down the road. Plus, when your carburetor is working like new again, you’ll be back on the road with that smooth ride you’ve been craving!